HOWTO: Use Globus (Overview)
![]()
Globus is a cloud-based service designed to let users move, share, and discover research data via a single interface, regardless of its location or number of files or size.
Globus was developed and is maintained at the University of Chicago and is used extensively at supercomputer centers and major research facilities.
Globus is available as a free service that any user can access. More on how Globus works can be found on the Globus "How It Works" page.
Data Transfer
Globus can be used to transfer data between source and destination systems including OSC storage, cloud storage, storage at other HPC centers with Globus support, laptops, desktops.
If you would like to transfer data between OSC storage and your own laptop/desktop which has not installed Globus Connect Personal yet, please go to 'Globus Connect Personal Installation' first
Step 1: Log into Globus
Log into https://www.globus.org/
When prompted to login, select "Ohio Supercomputer Center (OSC)" from the drop-down list of organizations and then click Continue. This will redirect you to the Ohio Supercomputer Center login page where you can log in with your OSC username and password.
Step 2: Locate collections of your data
Click 'File Manager' on the left of the page. Switch to 'two panel' view by clicking the appropriate icon next to 'Panels' in the top right corner. One panel will act as the source while the other is the destination.
In each panel, you can click 'Collection' to search and select the appropriate collection.
To find your local collection (the one created via Globus Connect Personal), you can use the 'Your Collections' tab.
To locate the correct collection from OSC storage, please see 'OSC endpoints'.
Step 3: Transfer the file
Select the file(s) or directory that you would like to transfer between collections.
Click the "Transfer or Sync to..." button in the center control panel (two diagonal arrows).
Click the blue "Start" button above the file selector.
A ribbon should appear that recognizes the transfer request. You can hit View Details to take you to the Activity tab in the command menu.
Step 4: Verify the transfer
Click Activity in the command menu on the left of the page to go to the Activity page.
A green checkmark will appear at the top of the page with a Transfer Complete Message.
The email you have set up with your Globus profile will receive a confirmation receipt of the request.
The files will now be accessible in the transfer location.
Globus Connect Personal Installation
Globus Installation on Windows
-
Launch the application installer.
-
If you have local administrator permissions on your machine, and will be the only user, click on 'Install'.
- If you do not have local administrator permissions or wish to specify a non-default destination directory for installation, or will have multiple GCP users, click on the 'Browse' button and select a directory which you have read/write access to.
- If you do not have local administrator permissions or wish to specify a non-default destination directory for installation, or will have multiple GCP users, click on the 'Browse' button and select a directory which you have read/write access to.
-
After installation has completed GCP will launch. Click on 'Log In' in order to authenticate with Globus and begin the Collection Setup process.
-
Grant the required consents to GCP Setup.
-
Enter the details for your GCP Collection.
-
Exit the Setup process or open the Globus web app to view collection details or move data to or from your collection.
-
At the end of the installation, you will see an icon in the menu bar at the bottom of your screen, indicating that Globus Connect Personal is running and your new collection is ready to be used.
OSC Endpoints
- Enter 'OSC Globus Connect Server' in the endpoint search box to find all the endpointss managed by OSC as below:
| Endpoint | |
|---|---|
| OSC's home directory | OSC $HOME |
| OSC's scratch directory | OSC /fs/scratch |
| OSC's ess storage | OSC /fs/ess |
| AWS S3 storage | OSC S3 |
| OSC high assurance |
OSC /fs/ess/ High Assurance for project storage OSC /fs/scratch/ High Assurance for scratch storage |
Globus Connectors
Globus connectors provide a consistent interface for accessing, transferring, and sharing data across a wide range of storage systems. OSC has acquired all available connectors including AWS S3, dropbox, with the exception of the HPSS connector. For a complete list of connectors, please visit the Globus connectors page.
Data Sharing
With Globus, you can easily share research data with your collaborators. You don’t need to create accounts on the server(s) where your data is stored. You can share data with anyone using their identity or their email address.
To share data, you’ll create a guest collection and grant your collaborators access as described in the instructions below. If you like, you can designate other Globus users as "access managers" for the guest collection, allowing them to grant or revoke access privileges for other Globus users.
-
Log into Globus and navigate to the File Manager.
-
Select the collection that has the files/folders you wish to share and, if necessary, activate the collection.
-
Highlight the folder that you would like to share and Click Share in the right command pane.
Note: Sharing is available for folders. Individual files can only be shared by sharing the folder that contains them. If you are using an ad blocker plugin in your browser, the share button may be unavailable. We recommend users whitelist app.globus.org, docs.globus.org, and globus.org within the plugin to circumvent this issue.If Share is not available, contact the endpoint’s administrator or refer to Globus Connect Server Installation Guide for instructions on enabling sharing. If you’re a using a Globus Connect Personal endpoint and you’re a Globus Plus user, enable sharing by opening the Preferences for Globus Connect Personal, clicking the Access tab, and checking the Sharable box.
-
Provide a name for the guest collection, and click Create Share. If this is the first time you are accessing the collection, you may need to authenticate and consent to allow Globus services to manage your collections on your behalf.
-
When your collection is created, you’ll be taken to the Sharing tab, where you can set permissions. The starting permissions give read and write access (and the Administrator role) to the person who created the collection.
Click the Add Permissions button or icon to share access with others. You can add permissions for an individual user, for a group, or for all logged-in users. In the Identity/E-mail field, type a person’s name or username (if user is selected) or a group name (if group is selected) and press Enter. Globus will display matching identities. Pick from the list. If the user hasn’t used Globus before or you only have an email address, enter the email address and click Add.
Note: Granting write access to a folder allows users to modify and delete files and folders within the folder.You can add permissions to subfolders by entering a path in the Path field.
-
After receiving the email notification, your colleague can click on the link to log into Globus and access the guest collection.
-
You can allow others to manage the permissions for a collection you create. Use the Roles tab to manage roles for other users. You can assign roles to individual users or to groups. The default is for the person who created the collection to have the Administrator role.
The Access Manager role grants the ability to manage permissions for a collection. (Users with this role automatically have read/write access for the collection.)
When a role is assigned to a group, all members of the group have the assigned role.
Data Sharing with Service Account
Sometimes, a group may need to share data uploaded by several OSC users with external entities using Globus. To simplify this process OSC can help set up a service account that owns the data and create a Globus share that makes the data accessible to individuals. Contact OSC Help for this service.
Further Reading
HOWTO: Use AWS S3 in Globus
Beofre creating a new collection, please set up a S3 bucket and configure the IAM access permissions to that bucket. If you need more information on how to do that, see the AWS S3 documentation and Amazon Web Services S3 Connector pages.
Create a New Collection
- Login to Globus. If your institution does not have an organizational login, you may choose to either Sign in with Google or Sign in with ORCiD iD
- Navigate to the 'COLLECTIONS' on the sidebar and search 'OSC S3'. Click 'OSC S3' to go to this gateway
- Click on the “Credentials” tab of the “OSC S3” page. Register your AWS IAM access key ID and AWS IAM Secret Key with Globus. Click the “Continue” button, and you will return to the full “Credentials” tab where you can see your saved AWS access credentials.
- Click on the 'Collections' tab. You will see all of the collections added by you before. To add a new collection, click 'Add Guest Collection'. Click the “Browse” button to get a directory view and select the bucket or subfolder folder you want. Provide the name of the collection in 'Display Name” field
- Click 'Create Collection' to finish the creation
- Click 'COLLECTIONS' on the sidebar. Click the 'Administered by You' and then you can locate the new collection you just created.
HOWTO: Use OneDrive in Globus
Accessing User OneDrive in Globus
Globus is a cloud-based service designed to let users move, share, and discover research data via a single interface, regardless of its location or number of files or size.
This makes Globus incredibly useful for transferring large files for users. This service is also able to work alongside OneDrive, making your this storage even more attainable. The OneDrive connection to Globus is only available for Ohio State clients with a valid OSU email.
Data Transfer with OneDrive
Step 1: Log into Globus
Log into https://www.globus.org/
When prompted to login, select "Ohio Supercomputer Center (OSC)" from the drop-down list of organizations and then click Continue. This will redirect you to the Ohio Supercomputer Center login page where you can log in with your OSC username and password.
Step 2: Choose the Appropriate Collections
Select the File Manager tab on the left hand toolbar. You will be introduced to the file exchange function in the two-panel format.

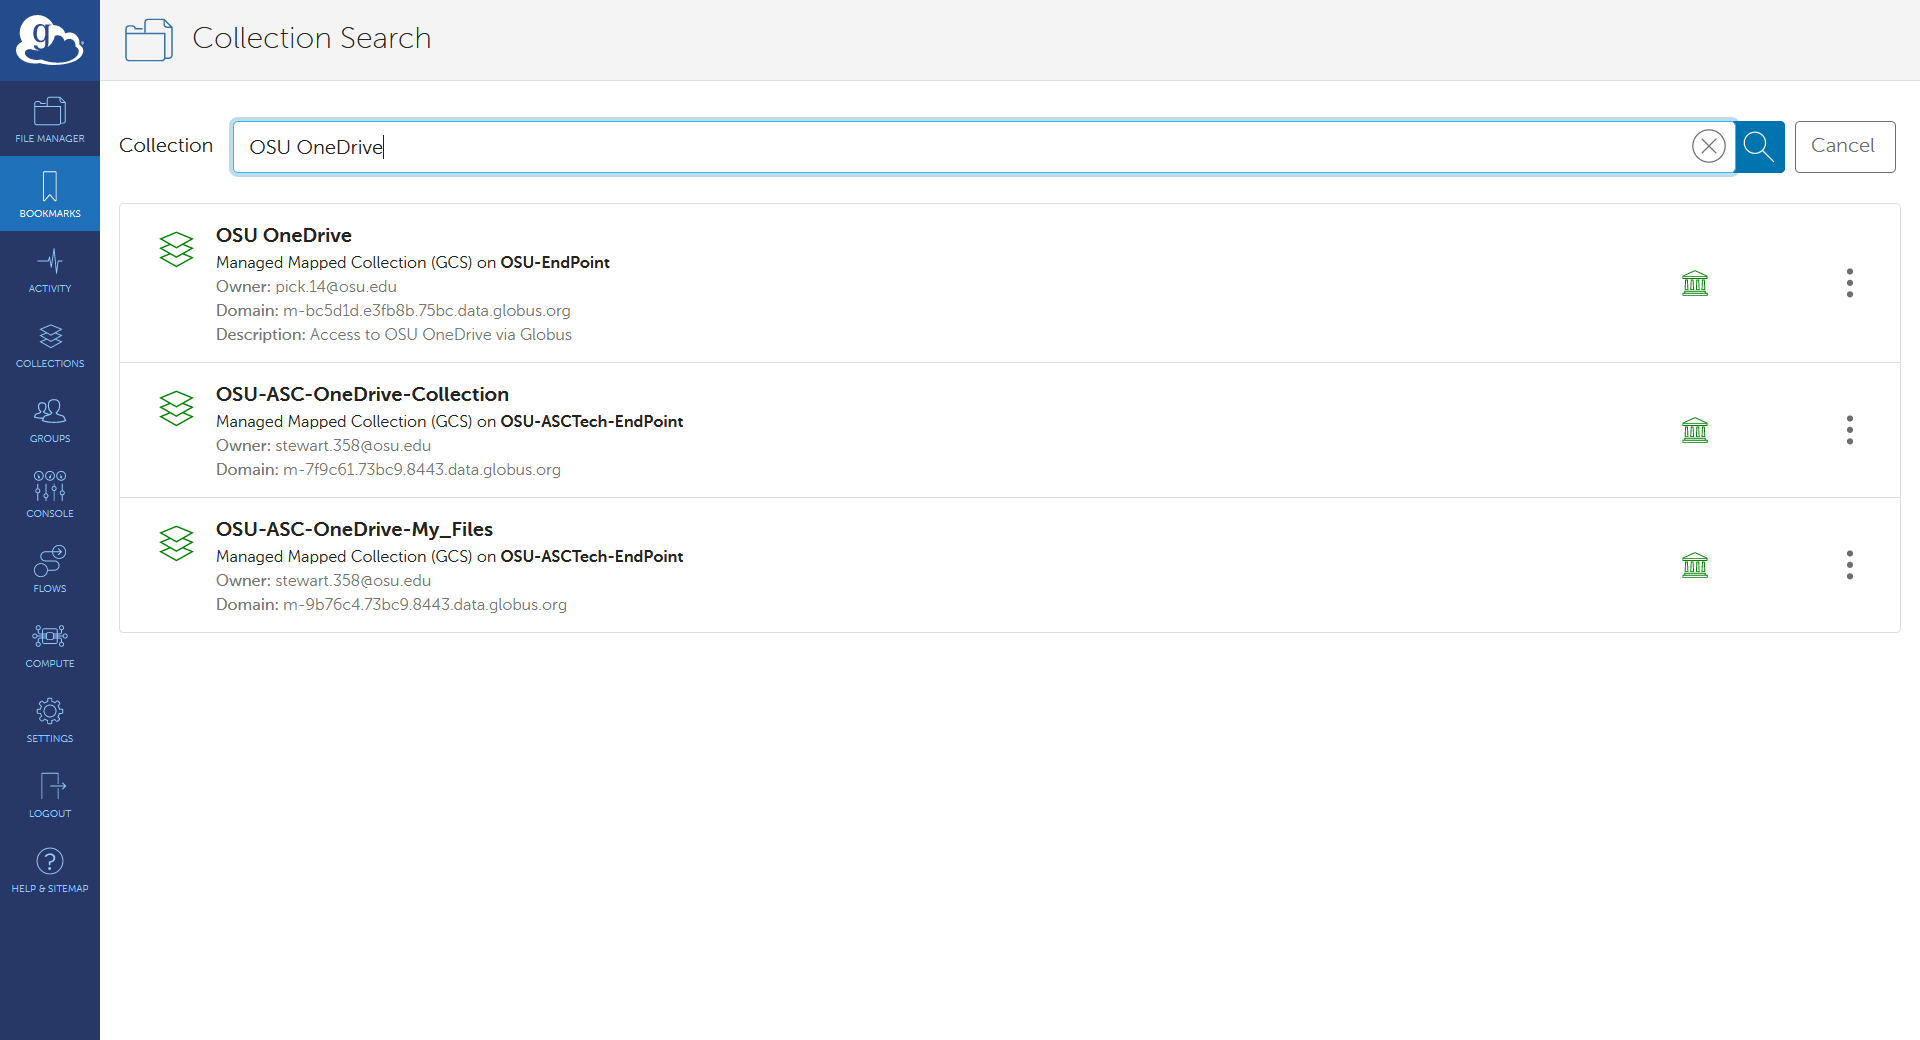
In the left panel, select the collection that you would like to import the data to. In the right panel, you can simply type "OSU OneDrive" or "OSU OneDrive Student" and the collection will appear. Students will need to use their buckeyemail.osu.edu emails in order to access the student OneDrive.
The first time that you access this collection, you will be prompted for some initial account setup.

Complete the Authentication Request and, if prompted, verify that you wish to grant access to the Collection.
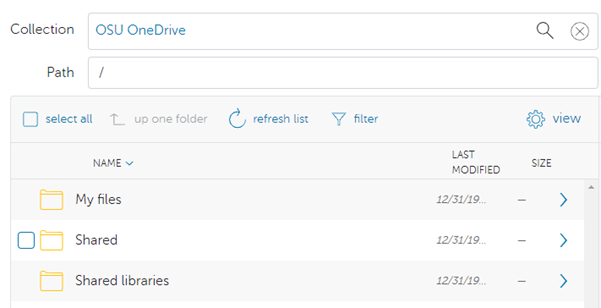
Once opened, the default location will be My Files. Click the "up one folder" icon to see the other locations.
Step 3: Transfer the Files
Select the file(s) or directory that you would like to transfer between collections. You can now select the "Transfer or Sync to..." and hit the blue "Start" icon above the file selector.
Step 4: Verify the transfer
Click Activity in the command menu on the left of the page to go to the Activity page. You will now be able to monitor the processing of the request and the confirmation receipt will appear here.
Following Sites in SharePoint
To follow a SharePoint site, log into the OSU SharePoint service with your OSC name.# credentials. Next, navigate to the site you would like to connect to via Globus and click the star icon on the site to follow:
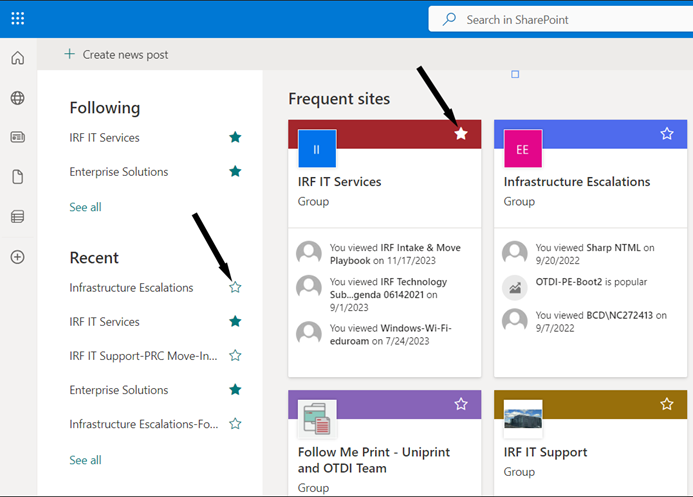
Finally, return to Globus and click the "up one folder" button until you see the "Shared libraries" and the SharePoint site will now be available.
HOWTO: Deploy your own endpoint on a server
OSC clients who are affiliated with Ohio State can deploy their own endpoint on a server using OSU subscriptions. Please follow the steps below:
- Send a request to OSC Help the following information:
- Name of organization that will be running the endpoint, ie: OSU Arts and Sciences
- NOTE: if the name already exists, they will have to coordinate with the existing Admin for that project
- OSU affiliated email address associated with the Globus account, ie: name.#@osu.edu
- Name of organization that will be running the endpoint, ie: OSU Arts and Sciences
- OSC will create a new project at https://developers.globus.org, make the user provided in #1 the administrator, and inform the user to set up the endpoint credentials
- The user goes to https://developers.globus.org/ and chooses “Register a new Globus Connect Server v5”. Under the project, the user chooses Add dropdown and chooses Add new Globus Connect Server. Provide a display name for the endpoint, ie: datamover02.hpc.osc.edu. Select “Generate New Client Secret” and save that value and Client ID and use those values when configuring the Globus Connect Server install on their local system
- The user finishes configuring Globus Connect Server and runs the necessary commands to register the new endpoint with Globus. Once the new endpoint is registered, please email OSC Help the endpoint name so we can mark the endpoint as managed under the OSU subscription