This documentation is to discuss how to set up an interactive parallel COMSOL job at OSC. The following example demonstrates the process of using COMSOL version 5.1 on Oakley. Depending on the version of COMSOL and cluster you work on, there mighe be some differences from the example. Feel free to contact OSC Help if you have any questions.
- Launch COMSOL GUI application following the instructions on this page. Get the information on the node(s) allocated to your job and save it in the file named hostfile using the following command:
cat $PBS_NODEFILE | uniq > hostfile
Make sure the hostfile is located in the same directory where you COMSOL input file is put
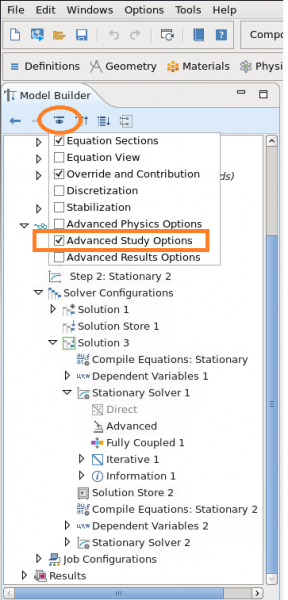
- Open COMSOL GUI application. To enable the cluster compuitng feature, click the show button and select Advanced Study Options, as shown in the picture below:
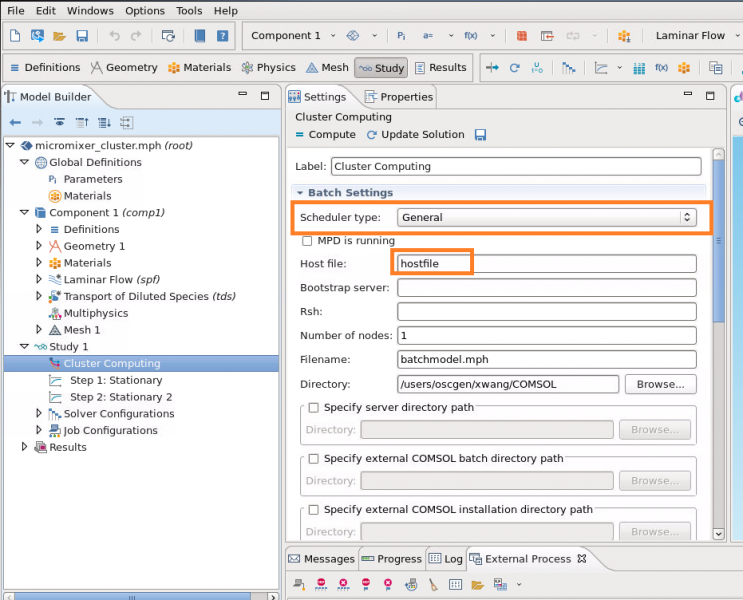
- In the Model Builder, right-click a Study node and select Cluster Computing, as shown in the picture below:

- In the Cluster Computing node's setting window, select General from the Cluster type list. Provide the name of Host file as hostfile. Browse to the directory where your COMSOL input file is located, as shown in the picture below:
- Save all the settings. Then you should be able to run an interactive parallel COMSOL job at OSC
Supercomputer:
Fields of Science: