GPU Usage on Tensorflow
Environment Setup
To begin, you need to first create and new conda environment or use an already existing one. See HOWTO: Create Python Environment for more details. In this example we are using miniconda3/24.1.2-py310 . You will need to make sure your python version within conda matches supported versions for tensorflow (supported versions listed on TensorFlow installation guide), in this example we will use python 3.9.
Once you have a conda environment created and activated we will now install tensorflow into the environment (In this example we will be using version 2.17.0 of tensorflow:
pip install tensorflow==2.17.0
Verify GPU accessability (Optional):
Now that we have the environment set up we can check if tensorflow can access the gpus.
To test the gpu access we will submit the following job onto a compute node with a gpu:
#!/bin/bash
#SBATCH --account <Project-Id>
#SBATCH --job-name Python_ExampleJob
#SBATCH --nodes=1
#SBATCH --time=00:10:00
#SBATCH --gpus-per-node=1


module load miniconda3/24.1.2-py310 cuda/12.3.0

source activate tensorflow_env


# run either of the following commands

python << EOF
import tensorflow as tf
print(tf.test.is_built_with_cuda())
EOF

python << EOF
from tensorflow.python.client import device_lib
print(device_lib.list_local_devices())
EOF
You will know tensorflow is able to successfully access the gpu if tf.test.is_built_with_cuda() returns True and device_lib.list_local_devices() returns an object with /device:GPU:0 as a listed device.
At this point tensorflow-gpu should be setup to utilize a GPU for its computations.
GPU vs CPU
A GPU can provide signifcant performace imporvements to many machine learnings models. Here is an example python script demonstrating the performace improvements. This is ran on the same environment created in the above section.
from timeit import default_timer as timer
import tensorflow as tf
from tensorflow import keras
import numpy as np


(X_train, y_train), (X_test, y_test) = keras.datasets.cifar10.load_data()


# scaling image values between 0-1
X_train_scaled = X_train/255
X_test_scaled = X_test/255

# one hot encoding labels
y_train_encoded = keras.utils.to_categorical(y_train, num_classes = 10)
y_test_encoded = keras.utils.to_categorical(y_test, num_classes = 10)

def get_model():
    model = keras.Sequential([
        keras.layers.Flatten(input_shape=(32,32,3)),
        keras.layers.Dense(3000, activation='relu'),
        keras.layers.Dense(1000, activation='relu'),
        keras.layers.Dense(10, activation='sigmoid')
    ])

    model.compile(optimizer='SGD',
              loss='categorical_crossentropy',
              metrics=['accuracy'])
    return model

# GPU
with tf.device('/GPU:0'):
    start = timer()
    model_cpu = get_model()
    model_cpu.fit(X_train_scaled, y_train_encoded, epochs = 1)
    end = timer()


print("GPU time: ", end - start)

# CPU
with tf.device('/CPU:0'):
    start = timer()
    model_gpu = get_model()
    model_gpu.fit(X_train_scaled, y_train_encoded, epochs = 1)
    end = timer()

print("CPU time: ", end - start)
Example code sampled from here
The above code was then submitted in a job with the following script:
#!/bin/bash
#SBATCH --account <Project-Id>
#SBATCH --job-name Python_ExampleJob
#SBATCH --nodes=1
#SBATCH --time=00:10:00
#SBATCH --gpus-per-node=1

module load miniconda3/24.1.2-py310 cuda/12.3.0

source activate tensorflow_env

python tensorflow_example.py
As we can see from the output, the GPU provided a signifcant performace improvement.
GPU time:  3.7491355929996644

CPU time:  78.8043485119997
Usage on Jupyter
If you would like to use a gpu for your tensorflow project in a jupyter notebook follow the below commands to set up your environment.
To begin, you need to first create and new conda environment or use an already existing one. See HOWTO: Create Python Environment for more details. In this example we are using python/3.6-conda5.2
Once you have a conda environment created and activated we will now install tensorflow-gpu into the environment (In this example we will be using version 2.4.1 of tensorflow-gpu:
conda install tensorflow-gpu=2.4.1
Now we will setup a jupyter kernel. See HOWTO: Use a Conda/Virtual Environment With Jupyter for details on how to create a jupyter kernel with your conda environment.
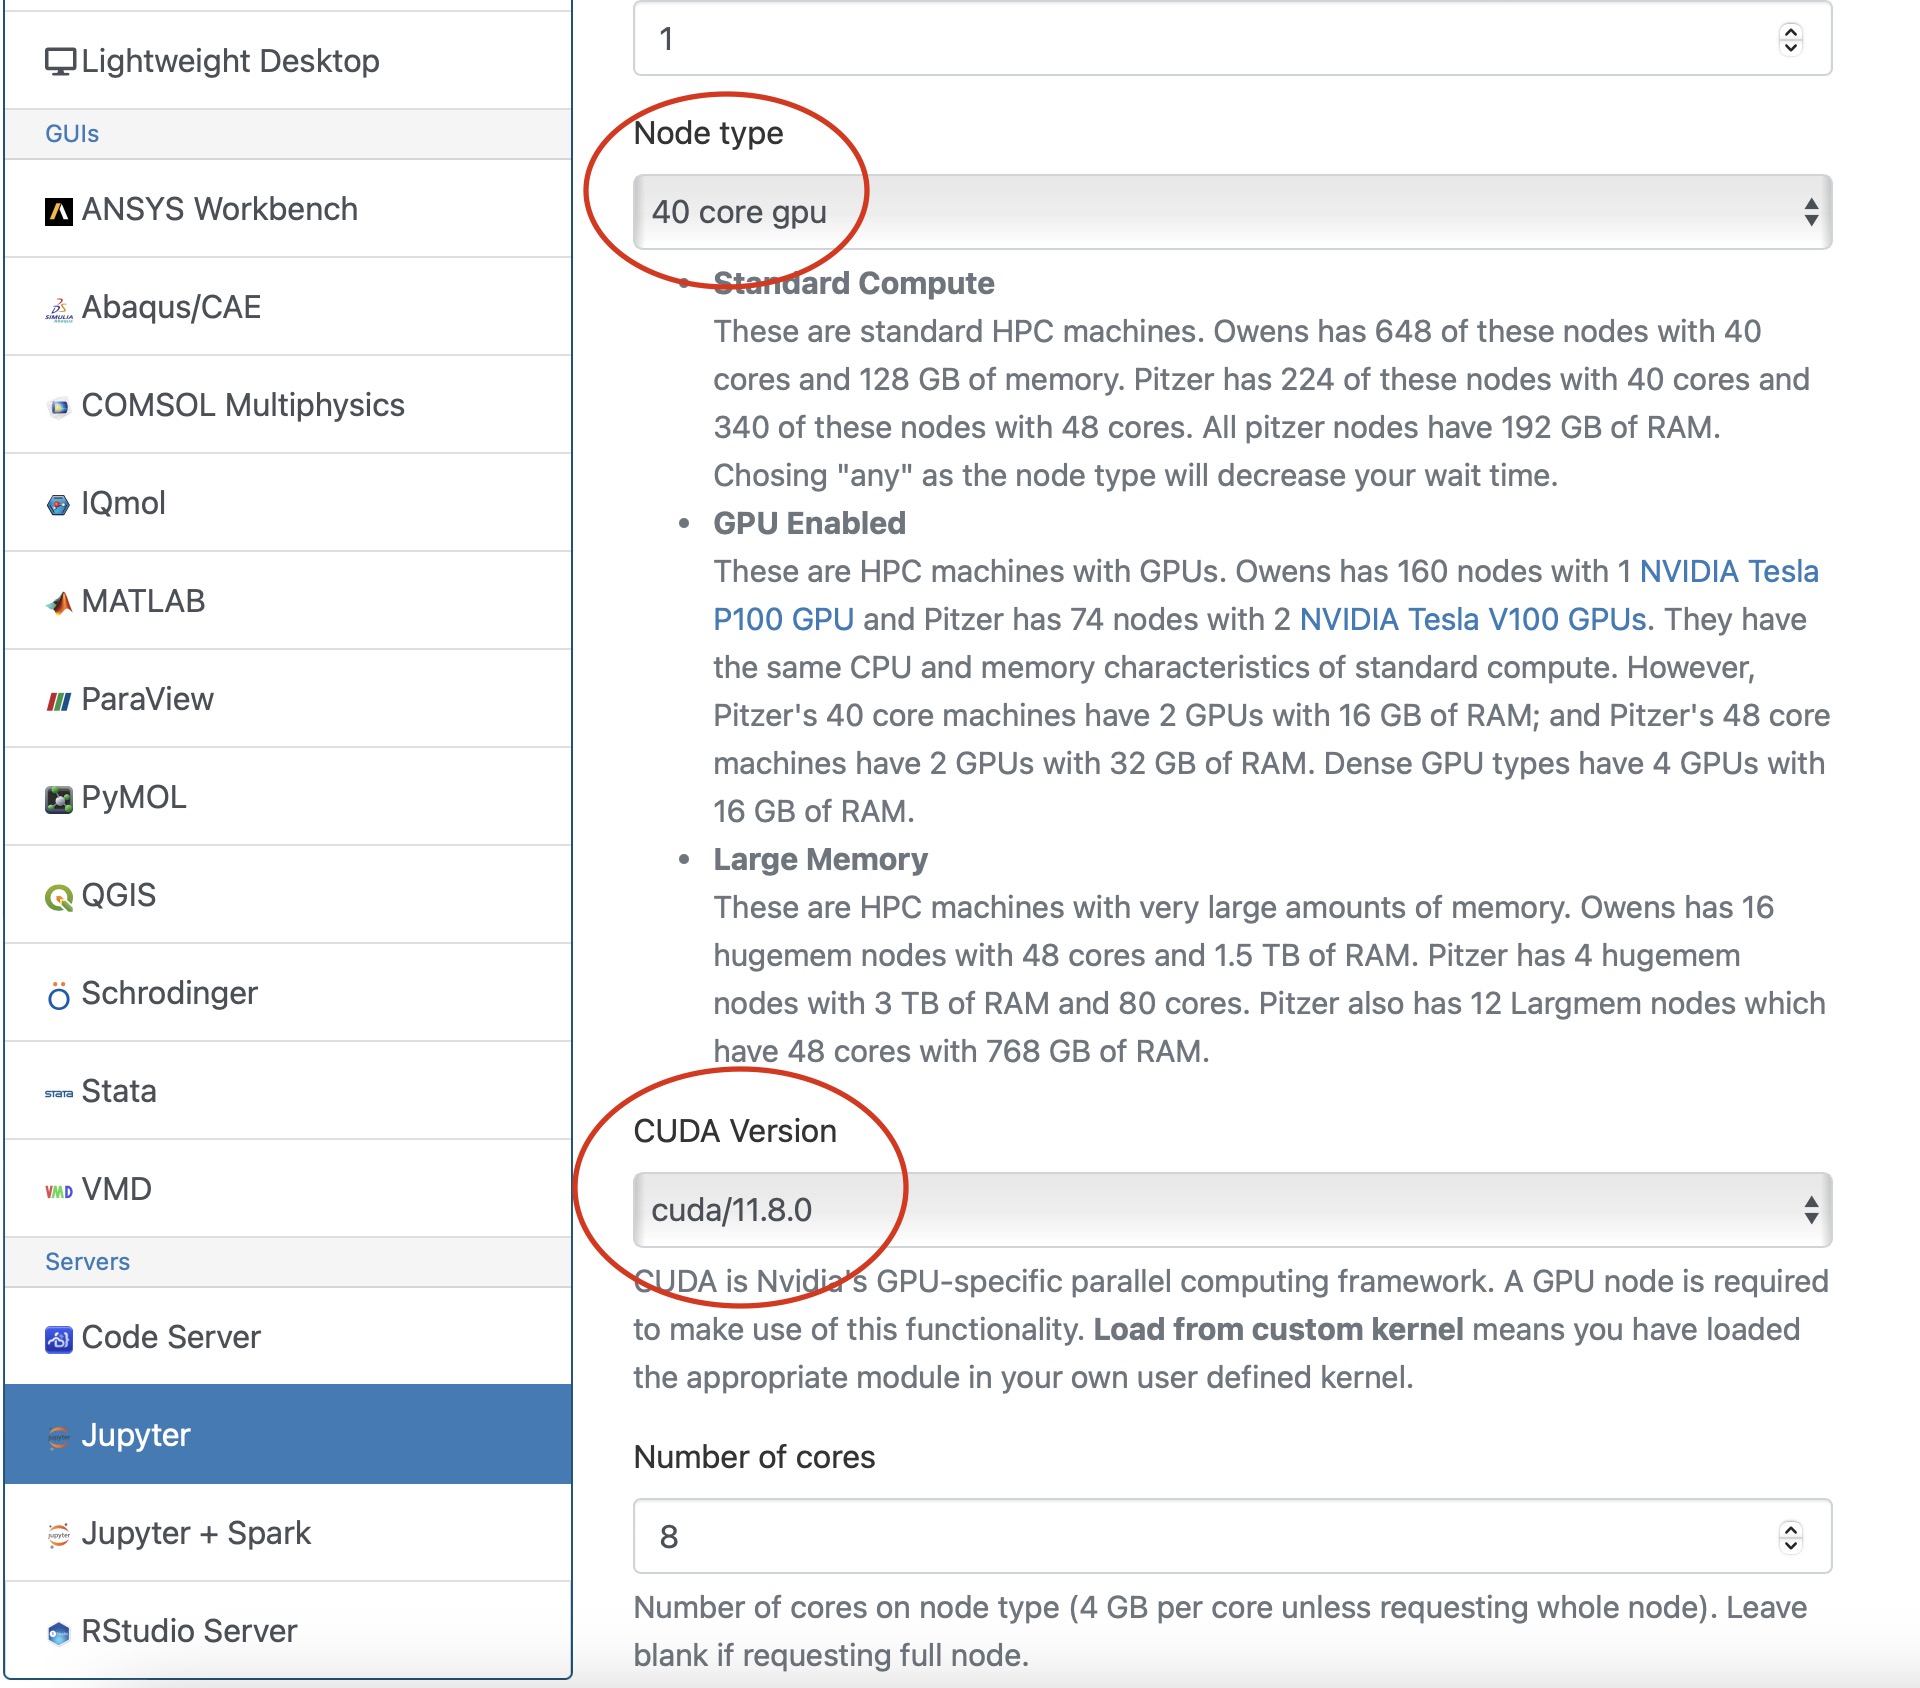
Once you have the kernel created see Usage section of Python page for more details on accessing the Jupyter app from OnDemand.
Now you are all setup to use a gpu with tensorflow on a juptyer notebook.
GPU Usage on PyTorch
Environment Setup
To begin, you need to first create and new conda environment or use an already existing one. See HOWTO: Create Python Environment for more details. In this example we are using miniconda3/24.1.2-py310
Once you have a conda environment created and activated we will now install pytorch into the environment (In the example we will be using version 2.3.0 of pytorch:
conda install pytorch=2.3.0
Verify GPU accessability (Optional):
Now that we have the environment set up we can check if pytorch can access the gpus.
To test the gpu access we will submit the following job onto a compute node with a gpu:
#!/bin/bash
#SBATCH --account <Project-Id>
#SBATCH --job-name Python_ExampleJob
#SBATCH --nodes=1
#SBATCH --time=00:10:00
#SBATCH --gpus-per-node=1


module load miniconda3/24.1.2-py310 cuda/12.3.0

source activate pytorch_env


python << EOF
import torch
print(torch.cuda.is_available())
device = torch.device("cuda:0" if torch.cuda.is_available() else "cpu")
print(device)
EOF
You will know pytorch is able to successfully access the gpu if torch.cuda.is_available() returns True and torch.device("cuda:0" if torch.cuda.is_available() else "cpu") returns cuda:0 .
At this point PyTorch should be setup to utilize a GPU for its computations.
GPU vs CPU
Here is an example pytorch script demonstrating the performace improvements from GPUs
import torch
from timeit import default_timer as timer


# check for cuda availability
print("Cuda: ", torch.cuda.is_available())
device = torch.device("cuda:0" if torch.cuda.is_available() else "cpu")
print("Device: ", device)


#GPU
b = torch.ones(4000,4000).cuda() # Create matrix on GPU memory
start_time = timer()
for _ in range(1000):
    b += b
elapsed_time = timer() - start_time

print('GPU time = ',elapsed_time)


#CPU
a = torch.ones(4000,4000) # Create matrix on CPU memory
start_time = timer()
for _ in range(1000):
    a += a
elapsed_time = timer() - start_time

print('CPU time = ',elapsed_time)
The above code was then submitted in a job with the following script:
#!/bin/bash
#SBATCH --account <Project-Id>
#SBATCH --job-name Python_ExampleJob
#SBATCH --nodes=1
#SBATCH --time=00:10:00
#SBATCH --gpus-per-node=1

module load miniconda3/24.1.2-py310 cuda/12.3.0

source activate pytorch_env

python pytorch_example.py
As we can see from the output, the GPU provided a signifcant performace improvement.
GPU time =  0.0053490259997488465

CPU time =  4.232843188998231
Usage on Jupyter
If you would like to use a gpu for your PyTorch project in a jupyter notebook follow the below commands to set up your environment.
To begin, you need to first create and new conda environment or use an already existing one. See HOWTO: Create Python Environment for more details. In this example we are using miniconda3/24.1.2-py310
Once you have a conda environment created and activated we will now install pytorch into the environment (In the example we will be using version 2.3.0 of pytorch:
conda install pytorch=2.3.0
You also may need to install numba for PyTorch to access a gpu from the jupter notebook.
conda install numba=0.60.0
Now we will setup a jupyter kernel. See HOWTO: Use a Conda/Virtual Environment With Jupyter for details on how to create a jupyter kernel with your conda environment.
Once you have the kernel created see Usage section of Python page for more details on accessing the Jupyter app from OnDemand.
Now you are all setup to use a gpu with PyTorch on a juptyer notebook.
Horovod
If you are using Tensorflow or PyTorch you may want to also consider using Horovod. Horovod will take single-GPU training scripts and scale it to train across many GPUs in parallel.